The role of a DIT is constantly evolving and media management has become an essential part of on-set workflow. With cameras producing massive amounts of data, up to 40TB in a single day according to Jane Fleck, our recent Data Expert Series interviewee, it’s no surprise that data management is becoming increasingly important. Virtual Production and the rising use of AR backgrounds are just a few factors contributing to this trend. In the same interview, Jane stated that “AR workflow creates four times the amount of data since there is a composite, background, foreground and matte for each camera.” Luckily, ShotPut Pro is here to help you securely and quickly offload the data produced on-set, allowing you to streamline your on-set workflow and keep your data safe. Keep reading to find out how ShotPut Pro can revolutionize your media management game!
Setting Up a Preset
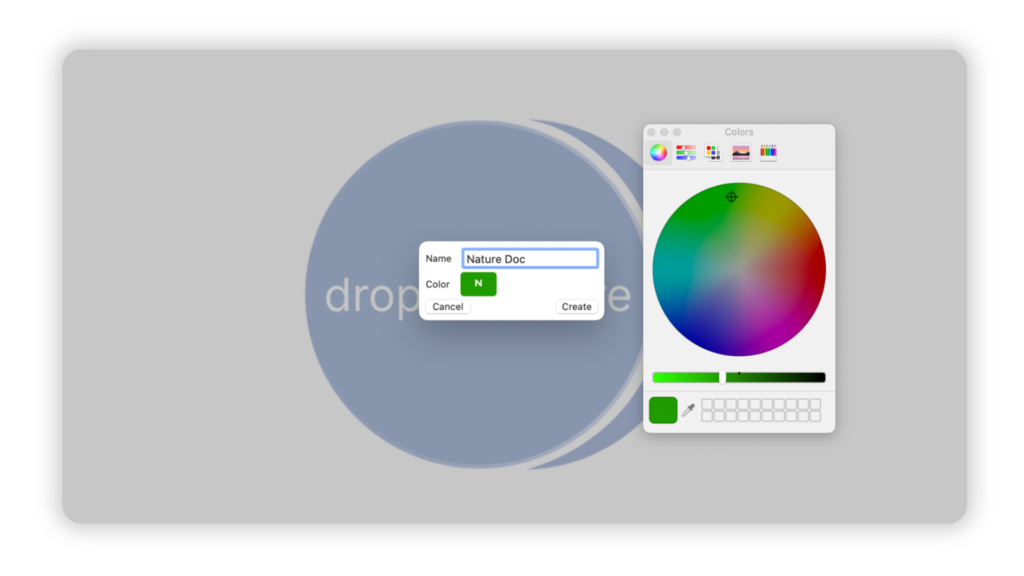
Simple Mode is a great option, but today we’ll show you how Preset Mode can take your media management to the next level. Before we dive in, be sure to check out our YouTube video for a comprehensive overview of Preset Mode’s features. Now, let’s get started by creating a brand new Preset and giving it a unique name and color. The color is set to help you keep your Presets organized visually and can changed to anything you would like. For the name, we recommend using a name that is easily identifiable, perhaps the name of the project you will be working on (e.g. Nature Doc).
Now let’s dive into the details of creating your preset. Don’t worry, it’s easy. First, select the preset you want to edit and let’s get started. The first thing you need to do is set up your Copy To locations. Simply connect the drives you’ll be offloading to, and once they appear in the left-hand panel use the drag-and-drop feature to add them to the preset.
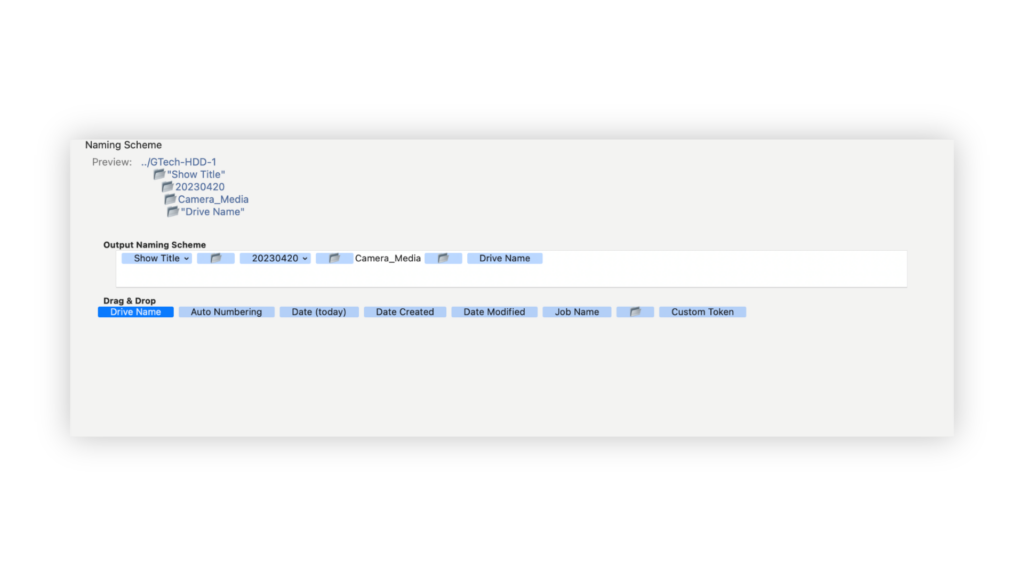
Next, it’s time to set up your Naming Scheme. If your client has a specific scheme in mind, make sure to use that. But if they don’t have any preferences, as a member of the Netflix Production Technology Alliance, we suggest using Netflix’s Required Folder Structure. It’s simple and easy to follow:
Show Title/ YYYYMMDD (Shoot Date)/Camera Media/Roll Folder
In ShotPut Pro, this Naming Scheme can be replicated by using the tokens as shown below…
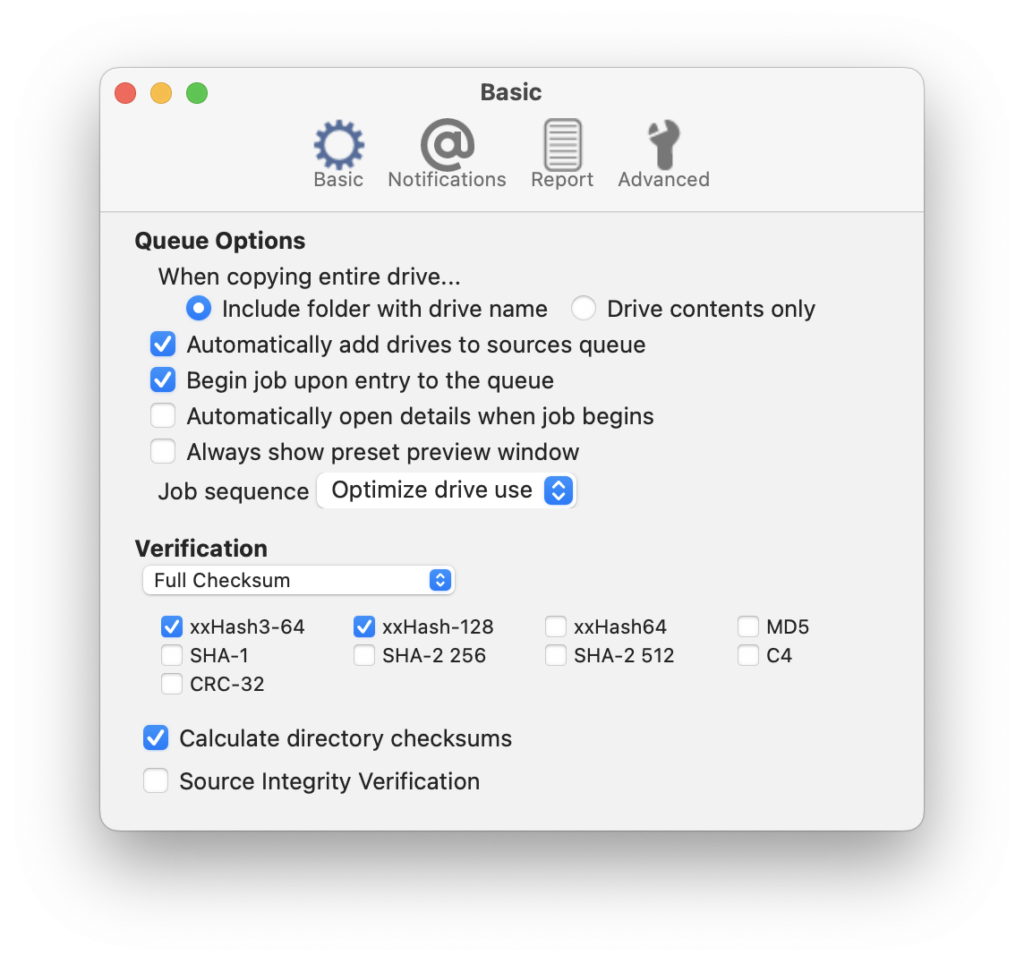
The final section when creating your Preset is to set your Verification. This step is crucial to ensuring your files are transferred securely and without any errors. You have the option to either match your preferences from your App Settings or customize them for this specific Preset. While the xxHash algorithms are typically the fastest, don’t forget to consider your client’s preferences and requirements too. Whether it’s MD5 or another option, it’s always a good idea to prioritize their needs.
Choosing Your Reports
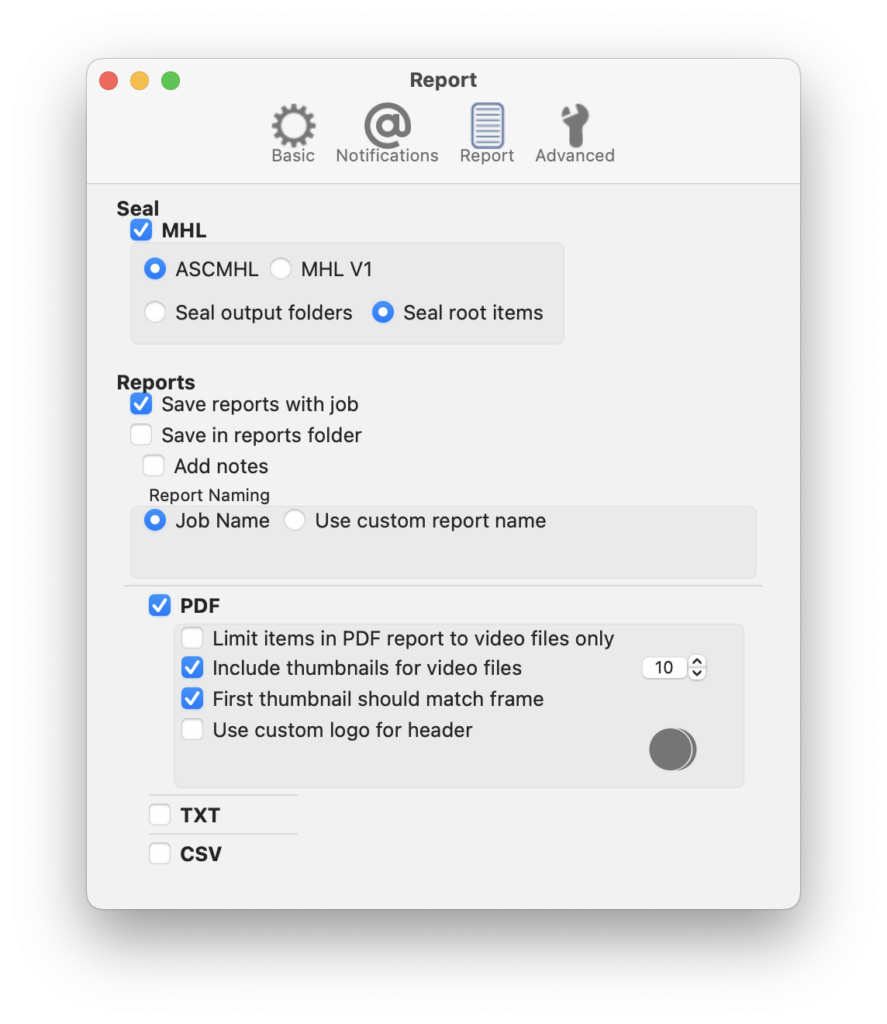
Once you’ve set up your Preset, head over to the Report Settings to select the needed reports to include with your completed jobs as specified by your client. And if there are no specifications given, don’t worry – we’ve got you covered. We suggest including both an ASCMHL seal and a PDF Report with Thumbnails to guarantee the safety of your data.
The ASCMLH seal is an industry standard developed as a collaborative effort between many industry leaders such as Imagine Products, Pomfort, and the American Society of Cinematographers (ASC). And with the PDF Report with Thumbnails, you can easily share a visual inspection of the job with clients and crew members alike. Best of all, this feature is included in every standard license of ShotPut Pro, so you don’t have to worry about any extra costs. You can learn more about ASCMHL in our article for The IABM where we go into detail on why it was created and its many uses.
Automating Your Workflow
When you’re a DIT, time is of the essence. That’s why we recommend setting up ShotPut Pro’s automation settings in advance so you can hit the ground running. With just a few clicks, you can save valuable time and eliminate any chance of human error. Start by plugging in the drives you’ll be offloading to (be sure to do this first, you don’t want to accidentally offload your destination drives), and head over to the Basic Settings panel. Here, you’ll find two automation settings that work seamlessly together to supercharge your on-set workflow: Automatically Add Drives to Sources Queue and Begin Job Upon Entry to the Queue.
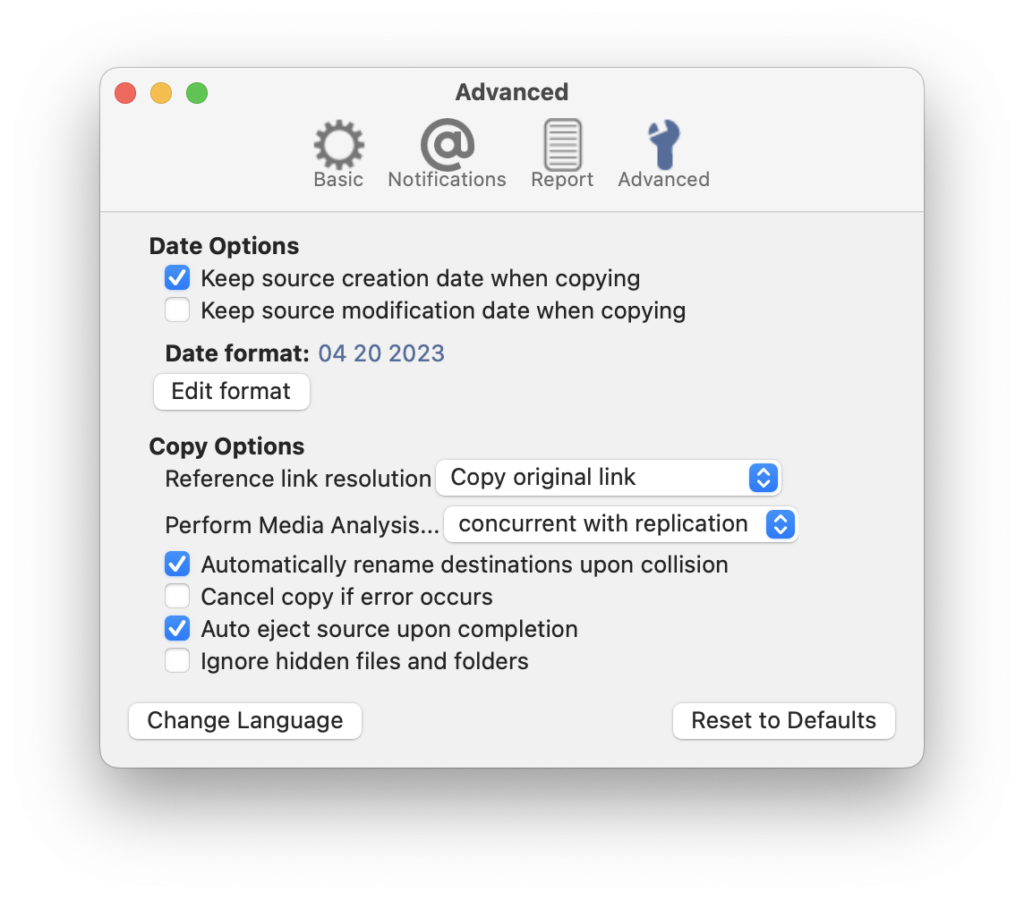
After selecting these, navigate to Advanced Settings to turn on one last automation setting, Auto Eject Source Upon Completion. Trust us, your future self will thank you for making these simple yet powerful tweaks.
The Offload
With each of the setting above activated, change ShotPut Pro to Preset Mode and toggle on the preset you have created. You are now ready to offload any drive that comes your way – big or small. Plug in any drive and watch as ShotPut Pro automatically adds it to the queue and starts the job using your customized Preset naming scheme, destinations, and verification types. Once the job is complete, the drive is ejected and you can use ShotPut Pro’s built-in tools to visually inspect the Job File Path and view a PDF report to ensure all thumbnails look correct.
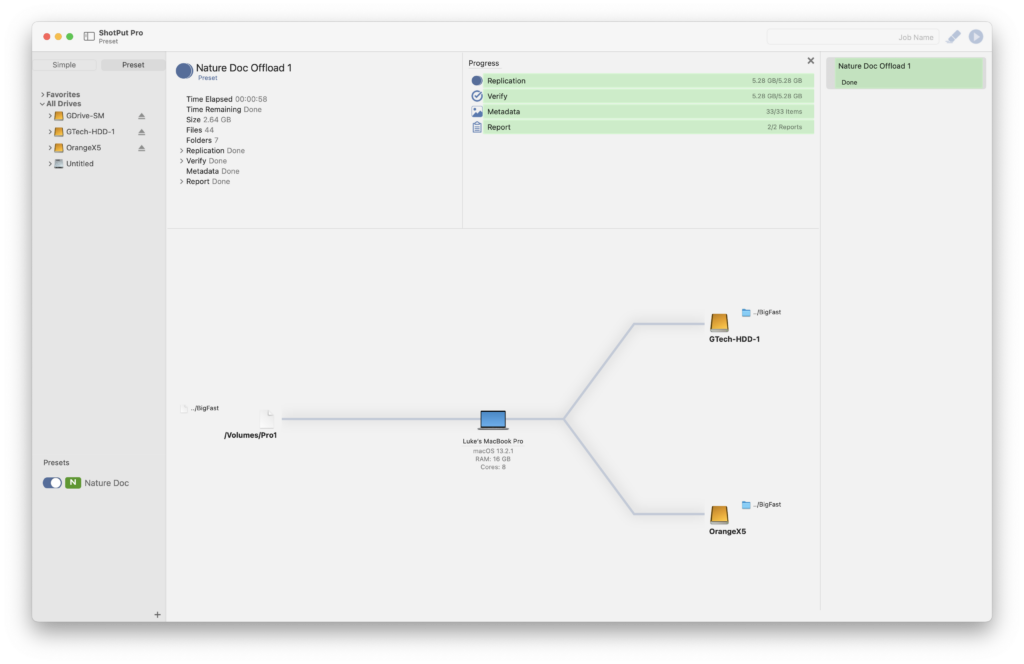
After a thorough inspection, the drive is ready to be disconnected and reformatted so that it can be returned and used again.
I hope that this real-world example has given you some actionable insights on how ShotPut Pro can transform your on-set workflow for the better. Don’t settle for a cumbersome, time-consuming media management process – with the right tools at your disposal, you can make your work easier and more efficient than ever before!
2 Comments
Is there any way to have a preset deselect when an offload is started or queues? This feature would help prevent accidentally offloading camera A into camera B’s folder with all the wrong naming conventions. This would be a great feature to add if its not already possible
Hi Tyler,
Unfortunately this is not currently possible, but I will add it to our future development.
Thanks for the feedback and please reach out to our support team if there is anything else we can help you with!