On-set media management can be stressful and time-consuming, often pulling your attention away from other tasks you’d rather be focusing on. And once your footage is offloaded, you’re left with the added responsibility of preparing it for the next step in the pipeline. This typically involves juggling multiple apps, dealing with various subscriptions or update plans, and paying for features you may not even need. That’s where ShotPut Studio comes in.
With its newest automation feature, ShotPut Studio lets you create a fully customizable workflow, all within a single app, launched with the click of a button. Here’s how it works.
In ShotPut Studio, an automation is a chain of your Copy, Transcode, and Report presets. To get started, you’ll first need to create the presets required for your workflow. This is the most time-consuming part of the process, but once completed, these presets can be reused across all your automated workflows and edited at any time to match your specific production needs.
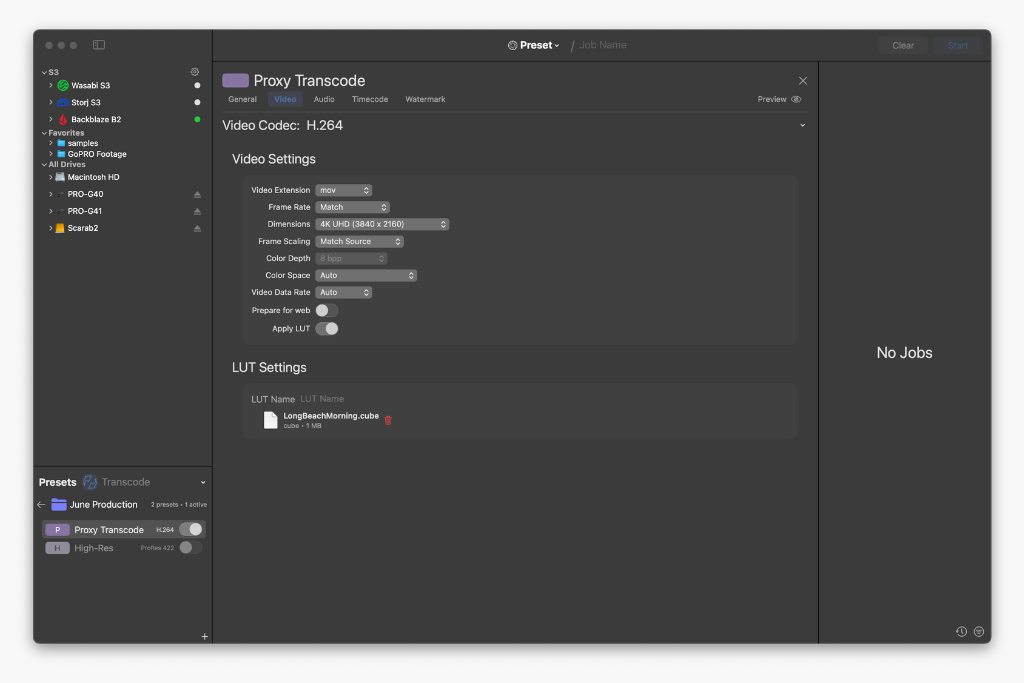
Editing the video settings in a Transcode Preset
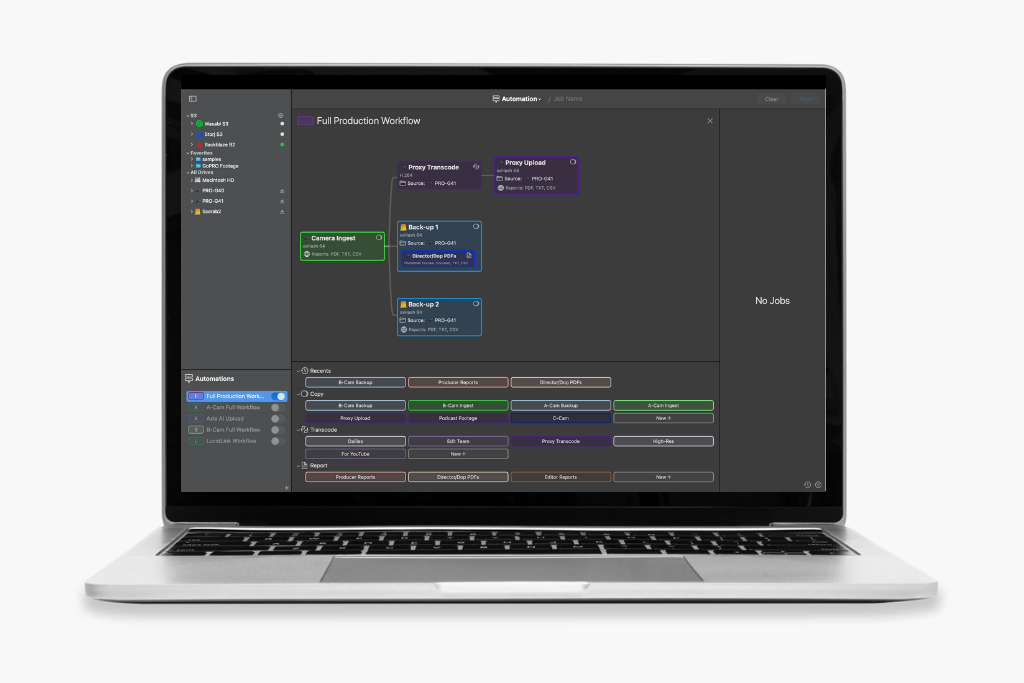
Once your presets are ready, head to the Pipeline Builder to construct your automated workflow. Using a simple drag-and-drop interface, you can add preset tokens to the builder. These tokens can be edited directly within the view, so you won’t need to switch between screens to make changes.
Drag & drop pipeline builder interface
It’s important to note that once a preset is added to a pipeline, any modifications made to it won’t affect the original preset. This enables you to create generic presets that cover 80–90% of your needs and then fine-tune them within each workflow, saving setup time.
In many cases, it’s helpful to create presets and workflows collaboratively with team members like the DoP, Producer, or Director. This ensures that media management and delivery expectations are aligned and tested before shooting begins, creating a smoother on-set experience.
For example, using the automated workflow shown below in combination with queue automation, connecting a camera card will automatically add it to the queue and start the workflow. The camera originals will be offloaded to an external SSD. Because Studio understands each step of the process, it doesn’t need to wait for the full job to complete before moving on. As soon as a file finishes copying, the next steps begin: a H.264 transcode with burned-in timecode and a LUT applied. Once transcoding is complete, each file is uploaded to a connected S3 bucket, ready for your editor to start work. In the meantime, after the initial ingest has been verified it begins the cascaded copies to both of your backup destinations.
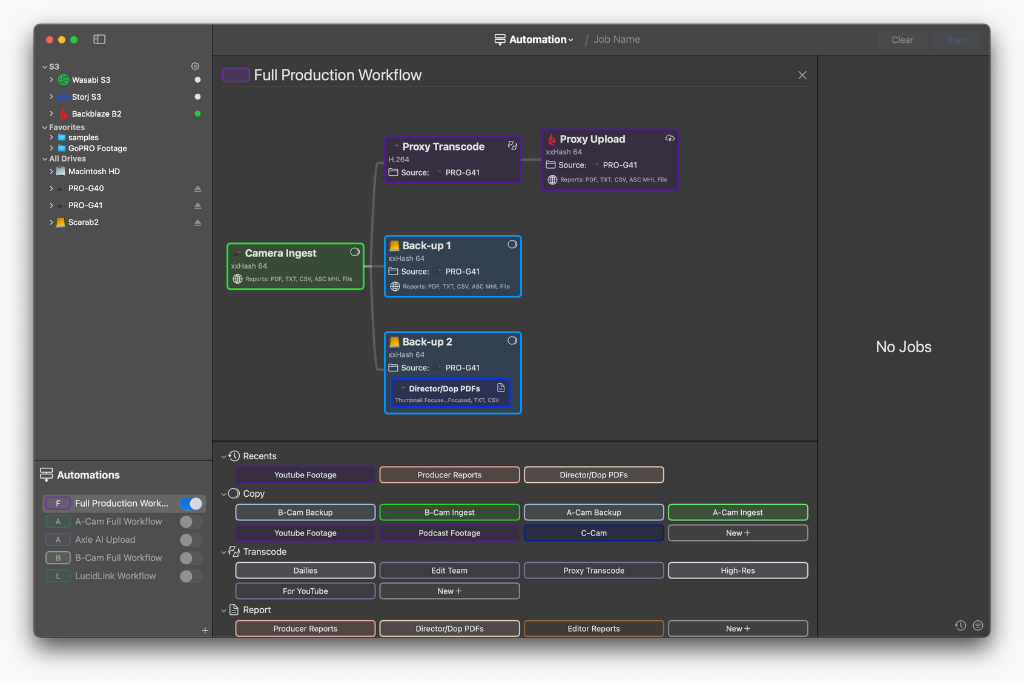
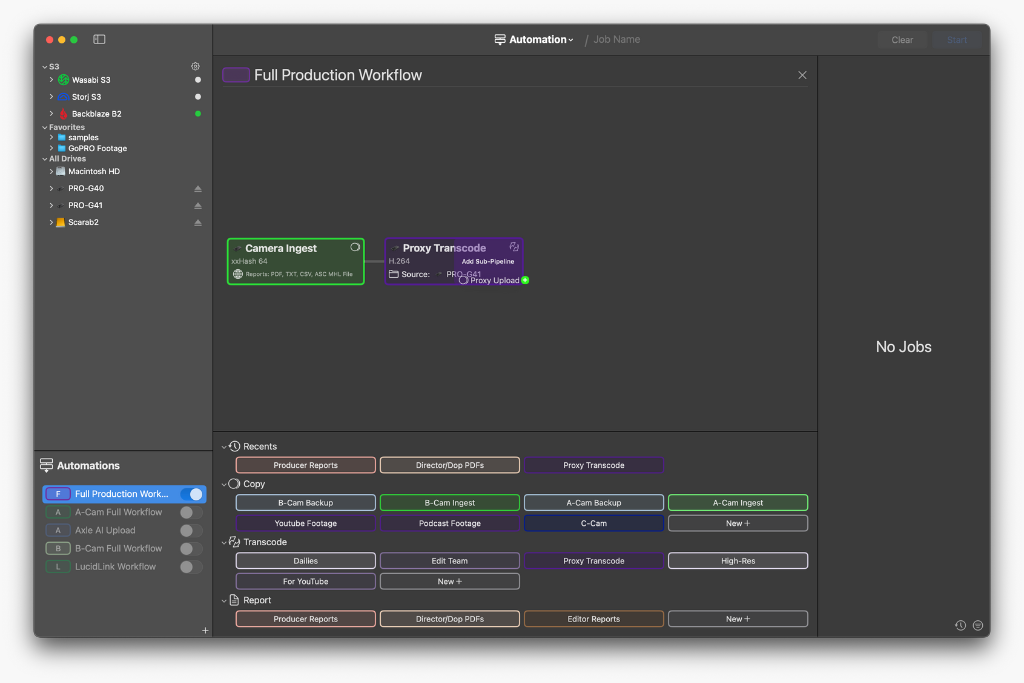
Fully created Automation Pipeline
After the entire workflow is finished, the card will be ejected from Finder, ready to be reformatted and returned to the camera.
Throughout the process, you can monitor everything in real-time using one of three progress overview tabs. Individual job progress is also accessible, with transcode outputs and PDF reports viewable directly from the interface for quality control.
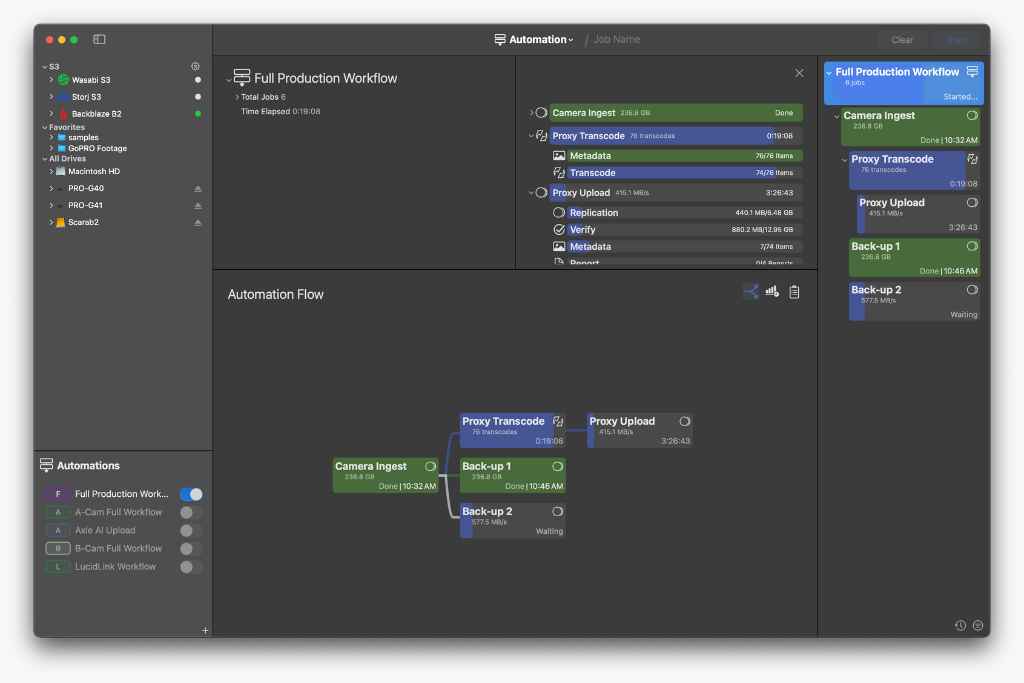
(1) Automation Flow showing visual progress in the pipeline
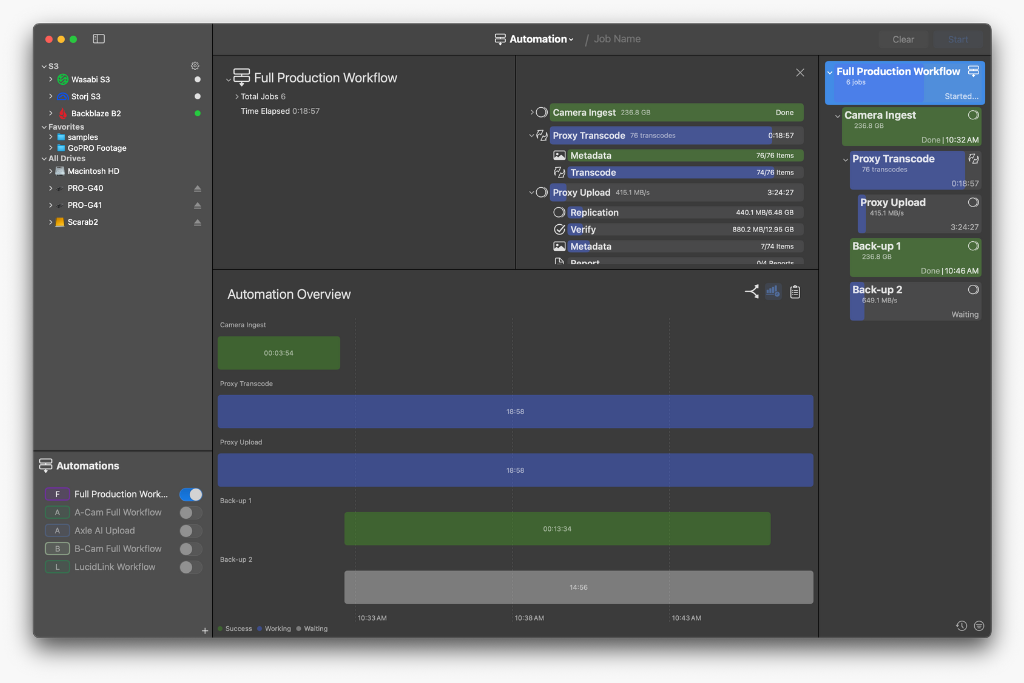
(2) Automation Overview showing time-based progress
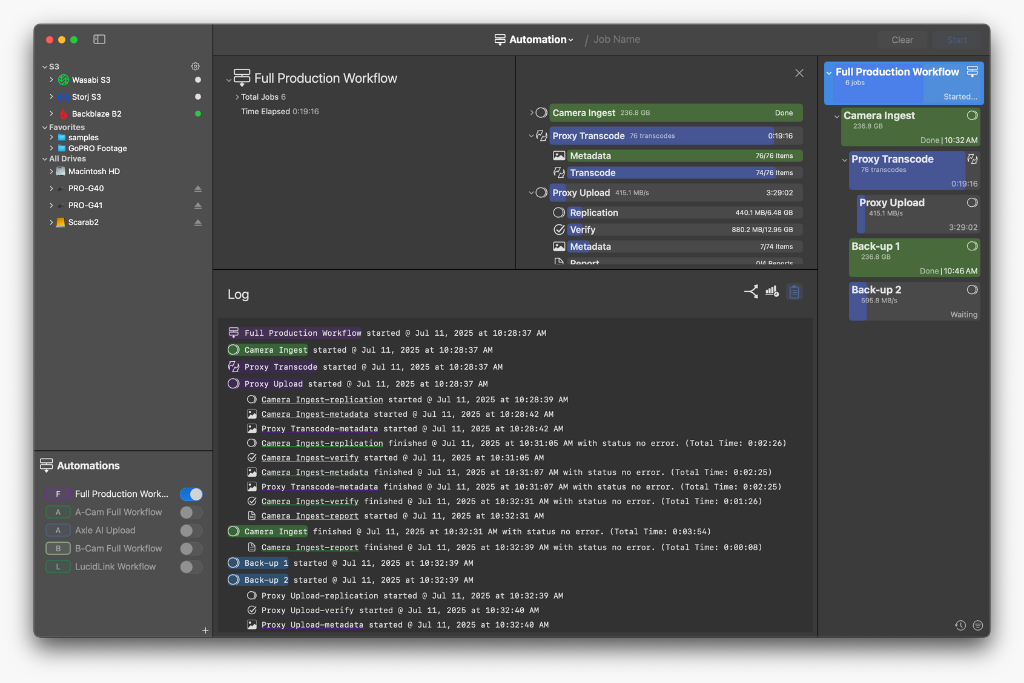
(3) Automation Log showing exportable text-based progress
This end-to-end automation solution significantly reduces manual intervention, minimizes errors, and accelerates turnaround times. For individuals, it means less time spent on repetitive tasks and more focus on creative or high-level responsibilities. For media managers, it ensures consistency, reliability, and clarity in complex workflows, helping teams stay aligned, efficient, and on schedule from set to post.
ShotPut Studio is available now in both Perpetual ($299) and Rental ($99) licensing. Already have a ShotPut Pro license and interested in trading it in? Contact our team at support@imagineproducts.com.